Big This Week

Recent Posts

Sunday, 19 July 2020

How To Buy What You Want For Less

When I first got into blogging, I thought that it would be an expensive hobby. However I find that you can still buy things that you want, and can also get some kind of deal too - it all depends on how much you are willing to wait. I wanted to write this post to shine some light on how I currently shop for the things that I want, beauty or otherwise. 


Black Friday

Black Friday is one of my favourite US traditions that has now came over to the UK. Although the US has better deals, anything electrical such as my MacBook Air and Dyson Vacuum Cleaner are the best items to buy as both products had a substantial saving which was around £150 off the original price. I actually start thinking about any Black Friday purchases a few months in advance and begin to write a list of what things I want to scout around for - this makes it easier for shopping on the day - as it's mostly done online. The things on this list aren't urgent things I need to buy and so I can wait a few months to ensure I get a better discount. This is also a great time to think about Christmas presents too as you will be buying the same thing around a month earlier and hopefully with a discount! 


Duty Free 

If I am going away I know I can utilise Duty Free to get some discounts on makeup, skincare, perfumes and sunglasses. I always ensure that I use this as although the saving might not be big, it is still a way to get the products you want for a better price. Duty Free is also a great place to buy handbags at a better price. I went to Heathrow back in February and spotted a Gucci Bag that was over £1100 that ended up being just around £980 in Duty Free. So Duty Free is a place where you can also make substantial savings too. 


Store Discounts 

Sometimes if you aren't going anywhere and Black Friday is too far away, I settle for normal store discounts. This can range from 10-20% which is still great, especially in stores like House of Fraser and Debenhams on their beauty products. I feel like sometimes we need something straight away and then we end up paying full price during times when these discounts aren't there, whereas if we shopped a bit smarter we would be able to get the same products for a better price. I always try and shop for the 3 for 2 deals in Boots and Superdrug too, as they can also save a lot of money in the long run, especially on products that I know I love and will use. 


Designer Outlets 


If you know me, you will know that I am a massive fan of Bicester Village, and I used to go there around every 2-3 months prior to COVID-19. I think it's such a great place to get brands that you love for a more affordable price tag. I think the trick with designer outlets is to not go there with a specific thing you want e.g. The Gucci Dionysus bag or the Dior Book Tote, but to have a vague idea of the style of bag you want and to see what they do have. I have bought a more than a few items from Bicester Village from Gucci, Coach, DKNY, Michael Kors, Hugo Boss and Monica Vinader just to name a few over the past few years. 


Joining Mailing Lists/ Memberships

Similar to store discounts, shopping during sales can also be advantageous. I'm a fan of online sales, where you don't have to go through hordes of clothes to find the one thing you want. Joining mailing addresses of the shops you love can come in handy. I'm a member of the H&M club, which gives free delivery to every member and also notifies members 24 hours before their sale launches and gives members access to shop the sale before everyone else, so that nothing is really sold out or not in your size. I have ordered clothes so many times at such a great discount that being a member and being notified via email is more exciting than annoying. If there is a particular store or brand you like, then I think it is worth joining a mailing list to get notified of any sales or discounts. 


So these are my top 5 ways of how to buy what I want for less, and it is about buying less impulsively. I think sometimes having time to stew over purchases also helps too as if is a faze, you can identify that quickly, however if after 3 months you still want the item then it may be worth investing in. If you would like to read more posts then be sure to follow me on Bloglovin to stay up to date! 
Share:

Tuesday, 31 March 2020

15 things to do whilst self-isolating

So March has been a long month and a lot has happened. As we are all isolating ourselves in our homes, I thought I would share some things that you can do while you are at home, to break the monotony and take advantage of the time that we have got. I will be sharing some examples of what I have been doing too!


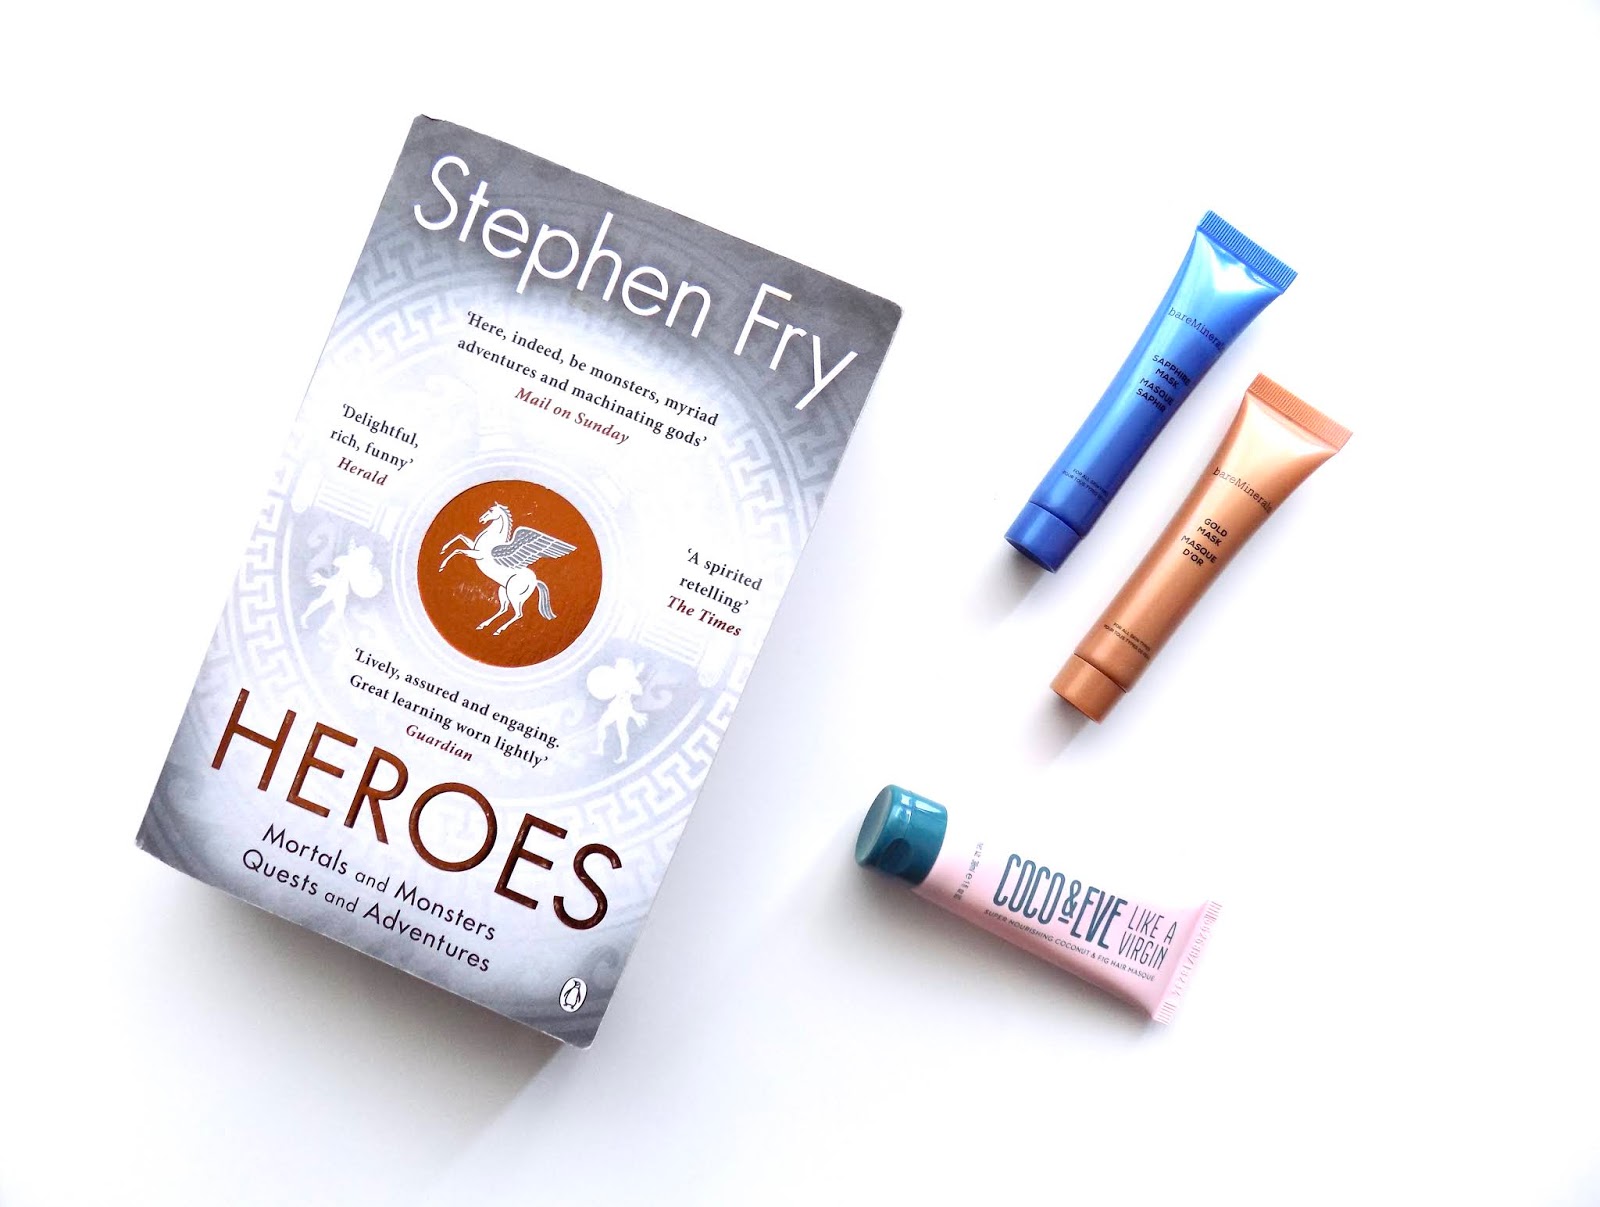
1. Read a book (I finished Heroes by Stephen Fry, and would highly recommend)
2. Do a jigsaw/ Play a game (I've found a deck of cards last weekend!)
3. Draw/ Colour
4. Listen to your favourite albums (I've been listening to old Muse Albums)
5. Plan a workout schedule


6. Listen to Podcasts (My Favourite Murder/ No Such Thing as Fish/ Is it Just Me?/ Science(ish))
7. Do a manicure/pedicure (my sister has kindly gave me both!)
8. FaceTime/ phone friends (I have been doing this while walking)
9. Bake a cake/ Cook a new dish (I helped bake my own birthday cake)
10. Clean or reorganise a space in your home


11. Give yourself a facial (I knew that Jade Facial Roller would come in handy!)
12. Practice Yoga/ Mindfulness (Yoga with Kassandra on YouTube is my favourite)
13. Watch a new movie with the lights dimmed for a cinema experience (I've done this once and it was great!)
14. Experiment and try a new makeup/ hair look
15. Give yourself a massage (I am planning on cracking out the Tonic Body Treatment Oil from Clarins!)


I hope you found at least one thing that was helpful on this list! Let me know if you have any more tips and tricks on new things to try as I would love to hear them.

If you would like to read more posts then be sure to follow me on Bloglovin to stay up to date! I have  some upcoming posts that you might find helpful!

Share:

Monday, 27 January 2020

A Comprehensive Guide to Skincare Ingredients

In this day and age we are lucky to be given so much information, however sometimes information can be dangerous. In skincare, companies sometimes take advantage of this, hyping up ingredients to generate more sales. In todays blog I wanted to clear the air with the most common ingredients you might be aware of and what they actually do. I will be adding a few links to products which feature the ingredient in question if you are interested in finding out more. 


1) Hyaluronic Acid
Hyaluronic Acid is a substance that is naturally found in your body, helping to retain water and moisture. Hyaluronic acid, when applied topically can help to hydrate the skin, and retain the moisture levels in your skin. It's commonly said that Hyaluronic Acid can retain 1000 times it's own weight in water, which shows how well this ingredient works. Hyaluronic Acid works well with humid weather, as it attracts the water in the air and binds it to your skin, so people in drier weather may have varying results. Personally, I view Hyaluronic Acid as a booster to your normal moisturiser, when applied to bare skin it can heighten the effectiveness and hydration of any moisturiser you add on the top of it. You can buy Hyaluronic Acid as a standalone product for a few pounds, however it is now commonly an ingredient that is formulated within moisturisers and serums.

1. The Ordinary Hyaluronic Acid 2% and B5 (£5.90/30ml)
2. The Inkey List Hyaluronic Acid Serum (£5.99/30ml)
3. L'Oreal Paris Hydra Genius Aloe Water (£9.99/70ml)


2) Vitamin C

Vitamin C, great for your body, but also your skin. Vitamin C is high in antioxidants, which means that it helps to protect the skin from 'free-radicals' (a naturally occurring unstable atom that prematurely causes ageing and diseases). So 'free-radicals' are something that we want protection against, and Vitamin C can provide this protection. Vitamin C is also proven to brighten the skin and also helps to even out skin-tone. Vitamin C can be viewed as 'anti-ageing' due to being high in antioxidants and so this is why brands try to include Vitamin C in their products. What is important to know is that Vitamin C is a highly unstable ingredient, which isn't a cause for concern, but brands may make the Vitamin C in their products less potent for this reason, or they might have a solution of Vitamin C suspended in an ingredient to make it more effective. The reason for this is that Vitamin C doesn't react well in water, or with oxygen and so brands will keep this in mind. I recently did a post around the Vitamin C collection by The Body Shop, which doesn't have a high concentration of Vitamin C, however can be viewed as a good introduction to the effectiveness of Vitamin C. 
Vitamin C can be used by all ages, however I believe it is important to do research to see how Vitamin C can fit into your regime and whether it may interact with other products you might already be using. I would urge you to read The Ordinary Guide to Vitamin C , I find that this website is informative around the products in their range, and outlines how the products may interact on your skin. 


3) Retinol
Retinols have revolutionised the skincare game utterly and completely. I first heard about retinols around 5 years ago, when Sunday Riley brought out her famous Luna Oil. So what is retinol? Retinol is a derivative of Vitamin A and also one of the proven anti-ageing ingredients out there (alongside Niacinamide and SPF). Retinol is an anti-ageing ingredient because it increases the cell turnover in the skin, stimulates collagen and elasticity in the skin which keeps it looking more youthful. Sounds perfect, however retinol comes in different strengths and so it is important to acclimatise your skin to retinol, so this means not applying it every single day. Retinol is known to irritate the skin, and so it is not for everyone. Brands like Sunday Riley and Elizabeth Arden ensure that the retinol is applied with ingredients that will also soothe the skin, so the product is not as irritating, helpful because one product can do it all, however this is also why products may be more expensive. Like Vitamin C, you can buy retinol as a single ingredient however again research is important as correct usage and aftercare is key. Applying SPF in the mornings following retinol is a must as you are uncovering new skin and you don't want this to become pigmented by exposure of UVA/UVB rays. 
If you are pregnant or currently breastfeeding, you should consult a dermatologist/physician prior to using retinol. 


4) Acids
There are a lot of types of acids which can be confusing at first however I will group them and outline their functions. 
Alpha Hydroxy Acid (AHA) is a water soluble acid which can help promote collagen, chemically exfoliate the skin which helps even out the skin-tone, and increases absorption of products.  Types of AHA's include Glycolic and Lactic Acid and only work on the surface of the skin.
1. Nip + Fab Glycolic Fix Night Pads (£14.95/60 pads) 

Beta Hydroxy Acid (BHA) is oil soluble, and so can gravitate deeper into pores to help remove impurities, and so works both on the surface and at pore-level. BHA's has good anti-bacterial and anti-inflammatory properties, and may be more suited for those with congested oily skin.  Types of BHA's include Salicylic Acid.
2. Mario Badescu Drying Lotion (£16.00/29ml)


5) SPF
Lastly, I want to talk about Sun Protection Factor (SPF) which I believe is the most important skincare ingredient that I could talk about and one that everyone should be using. There are two different types of rays emitted from the sun, UVA, which causes the skin to age and UVB, which causes damage to the skins surface and associated with sunburn and skin cancer. The SPF rating  (15, 30, 50 etc) tells you how long you are protected from the UVB rays before you begin to burn. Measuring UVA protection occurs through a rating scale from PA+ to PA++++, PA++++ being the most protection. Ensure that your SPF protects you from both UVA and UVB rays, this is sometimes called 'broad spectrum', however having the rating and SPF outlined clearly is optimal. 
The benefits of SPF are that it protects your from the sun, which accelerates the signs of ageing and  can darken hyper-pigmentation. Applying SPF on a daily basis can maintain an even skin-tone, especially if you are using Vitamins C, acids and retinols which are trying to uncover newer skin and so protecting this consistently is important. 


That completes my comprehensive guide to the mainstream skincare ingredients you might come across! I hope that this post makes sense. I really enjoyed compiling this post, I am by no means an expert but I love learning about skincare and how ingredients interact with each other. Let me know if you found this helpful and if there is any ingredients that you would like me to feature. 

If you would like to read more posts then be sure to follow me on Bloglovin to stay up to date!
Share:

Monday, 2 September 2019

5 Common beauty mishaps (+ fixes)

I love Instagram, don't get me wrong, but the completely polished look is unattainable 24/7. Mistakes happen and sometimes we are just short of time and that's fine. Sometimes our nail polish chips after the first day, we applied too much blush, or the mascara smudged on our eyes and we forgot to wipe it off. If you are prone to common beauty mishaps along these lines, stay tuned and I can recommend some solutions! 


The Perfect Wing
Like eyebrows, I believe that when lining your eyes we should be aiming for sisters, and not twins. Firstly because you don't want to spend an eternity doing your eyeliner and secondly people don't tend to notice your eyeliner once you have mascara on anyway. I'm not too fussy about my own eyeliner, however if I make a mistake that is going to be obvious, there are two tricks I like to use. The first is to use a cotton earbud to sharpen out the wing, or even erase it to start again. I like to use some eye-makeup remover to do this, although micellar water would also work. If there is no hope, I love to smudge out my eyeliner for more of a smokey, grungy look which can be less precise - having a soft eye pencil can help to create this look.

Gooey polish
I find that if I love a nail polish it's easy for me to reach the bottom of the barrel quickly, and sometimes we just have to make do with what we have, however in this case it leaves us with an uneven finish which, for me, ends up coming off fairly soon anyway. So if you have found that your nail polish has gone a bit gloopy, I would try one of two things. Firstly, try putting a small amount of nail polish remover in the polish and giving it a shake. This can help to get some of the dried polish off the sides and also turning the polish into a thinner consistency, it might also make the colour slightly less opaque too. The second thing you can do is heat up the polish with a hairdryer, again this helps to melt the polish so that it is more of a liquid consistency again! These tips should help to prolong your polish for at least another application. Below I have shown the nail polish with the remover colour compared with the gooey polish that it started out as!


Frizzy hair/flyaways 
As a person who walks 30 minutes up and down a hill to get to work, I am no stranger to the occasional frizz. A nice way to tame this is to warm up some handcream between your palms and then smooth down the hair. This is a great way to tame the hair but also the hand cream adds a mild scent too! I find that using handcream is not as greasy on the hair, and just adds enough product to put down those flyaways and tame a bit of frizz. It's also something that you might always carry in your bag too!

Bed sheet Nails
Everyone raise their hands if they have painted their nails just before they go to sleep, not moving an inch the whole night, but still finding that their nail polish has been defiled by the bed sheets. 
It is the worst. 
We usually do this because we are short on time and might have to rush in the morning. What I recommend is to do the same and apply the majority of the polish the night before however in the morning, apply a gel coat that is thicker in consistency. The gel coat will smooth over the texture and give that shine of a perfect manicure. I would highly recommend the Kiko Milano Gel Effect Nail Polish as it dries down within 5 minutes, however the Maybelline SuperStay Gel Effect is one that is thick in consistency and is more easily accessible. The first photo below, you can see that my nails aren't really the right texture, however once I have added the gel polish over it, you can't see any textural issues!


Clumpy/Dry Mascara
I love a dry mascara, I find that this consistency really helps to hold up my lashes after I have curled them, however once your mascara is dry, there is a small amount of time to work with it before it's completely unusable. In the same vain as the gooey polish, I find that if I want to have a thinner consistency of mascara, then heating it gently with a hairdryer works really well!

So those are my 5 mishaps and fixes - I have to say that these are also mishaps that happen to me regularly, and so I hope someone else can benefit from all the mistakes that I make! Let me know if you have any mishaps and fixes too! I would love to learn more hacks! If you would like to read more posts then be sure to follow me on Bloglovin to stay up to date!


Share:

Monday, 17 June 2019

5 Skincare Tips

Over the years, I have gathered some helpful tips when it comes to caring for your skin. These tips and tricks are things I do myself and although some of them aren't groundbreaking, it might require you to switch up how you do things, even if it is just a little! I have also collated some information on anti-ageing at the end, so be sure to give that a read!


1. Pat don't rub 
Our skin is quite fragile and sometimes it's the things we don't consider that might be irritating your skin. After washing your face, it's common to get a towel to rub off all the excess water. However this is quite aggressive on your skin, so I would propose that you pat the towel onto your skin as it will get rid of the water in a more gentle way. 
Similarly, when applying products into the skin, such as serums and eye-creams, rubbing the products on the skin is just going to aggravate the skin and sometimes you end up rubbing the product off or the product ends up going in the wrong place. I'm also not going to say that rubbing your skin will cause wrinkles, but you are decreasing the elasticity of the skin by doing this. Again, I would propose pressing serums and eye creams onto the desired areas, so that they can absorb nicely in those areas. 

2. Wash, Wash, Wash 
I wash my face twice a day and that suits me well. Everyone is different when it comes to how much they should wash their face and that's just fine. This point is more about how well you might be washing your face. After I have cleansed my face and I am rinsing my skin of the products, I will rinse my face at least 5-10 times with water. This seems excessive however if you only rinse your face once or twice trying to get the excess face wash off, then chances are that you probably haven't got rid of the product fully which means that you might still have makeup/dirt/face wash on your face and you are applying more skincare products on top of this. If you think your face is clean of any products, it's probably best you rinse another time to be sure. 

3. Less is more 
I can fully say that this is my weakness. When I was first interested in skincare, I was trying everything from cleansing brushes, acids, toners and retinols - chopping and changing so often that my own skin couldn't keep up. 
Now, I'm a firm believer in a fixed routine that has minimal products, I'm aware that I might still apply more products than the average person but this is my current minimum:

Morning: Exfoliate and cleanse. Follow up with a serum, moisturiser, lip-balm, eye-cream and SPF.
Evening: Oil cleanser (to remove makeup), exfoliate and cleanse. Follow up with serum, moisturiser, lip-balm and eye-cream.


4. If it ain't broke...
Like the previous point, it's easy to go overboard with skincare and end up causing damage rather than helping your skin. If you do really want a product, then ask yourself whether there is a skin concern that you want to address and if the product you want will fulfil this. It's easy to get carried away with adverts claiming to be the holy grail of products but sometimes it's good to look at why what you are already using is currently working. Chances are that there is no added benefits about the product you wanted to buy, however I do understand buying something if it will help with a specific skin concern or other factors such as price and accessibility. 

5. Anti-ageing / SPF 
Anti-ageing can only be achieved through preventative measures. If you are over 25, I would start thinking about what you can do to help your skin retain it's moisture and elasticity. Skincare can't fix everything - lifestyle factors play a part too, drinking enough water, getting enough sleep, drinking, smoking - no amount of money you spend on a product can fully reverse a lifestyle that has spanned over decades. However there are 3 products/ingredients that are known to be truly anti-ageing, I will talk about them each below. 

5.1. SPF: It's widely known that UVA rays can cause signs of skin ageing such as wrinkles, and no matter whether it's an overcast day those rays are still there. I am a big believer in applying SPF everyday regardless of the weather. 

5.2. Retinols: A derivative of Vitamin A, Retinols and Retinoids are known for increasing the cell turnover in the skin, which means that skin acts in the same way as it did when you are younger, helping signs of ageing such as wrinkles, uneven skin-tone, elasticity and even things like acne and shrinking the size of pores. Although this sounds ideal, Retinols can be irritating on the skin so be careful before trying any and be informed about the percentage that you are using as this determines the strength and potency of the product. Check out Caroline Hirons blog and YouTube for more in-depth information about Retinols from an expert. 

5.3. Niacinamide: AKA Vitamin B3 is an ingredient that I don't think most people are aware of. Another proven anti-ageing ingredient that can reduce fine lines and wrinkles with prolonged use and can clinically reduce pore size and skin texture. If you are interested, it's worth researching this before purchasing- I use The Ordinary's Niacinamide and Zinc 10%. Again, it's worth paying attention to the percentages of the product. 

I could go on forever talking about those three ingredients, so if you are interested in them then be sure to let me know and I can do more of an in-depth post about them. As a bit of a disclaimer, I am not a dermatologist or a skin expert, I just like to stay up to date with the latest ingredients and do tend to research them before sharing them with other people. I would advise anyone to also do their own research before purchasing a product too.

I hope this post has been helpful, let me know if you do have any questions, and will be happy answer them or direct you in the right direction! If you would like to read more posts then be sure to follow me on Bloglovin to stay up to date!
Share:

Thursday, 26 July 2018

My 3 go-to Summer Makeup essentials

Now that summer is in full swing, I've noticed that I reach for certain pieces of makeup that just encapsulate the summer vibe....


When I think of summer makeup, I think of a lighter more glowy base. The Charlotte Tilbury Flawless Filter (30ml/£30.00) is a product I use daily, I find that it just gives that 'lit from within' look, and even makes bare skin look at its optimum health. If you haven't tried it, I would really urge you to. I've written a full review here. The reason why it's in this little edit is because it adds the glow without overtly adding shimmer and shine to the cheeks - this is why it's an essential, it's something you can pop under makeup, over makeup, mix in with foundation, or with no makeup at all. I use the shade '5 Tan' this under my foundation, and just use a half pump of foundation, and just let this product do all the work. The result is basically a Victoria's Secret version of yourself - what's not to like? Scroll to the end to see swatches!


Like I've said earlier, when I think of summer makeup, I think more about skin and a healthy tan. I'm already tan all year round, but what I have been reaching for is my NARS 'Liberté' blush (£24.00/4.8g). I love NARS blushes, they have the right about of pigment and blendability, which means you can see them on the skin but they don't look crazily out of place either. This shade in particular is that mix between orange and peach, and so really emphasise a tan, giving you that healthy vibe. I just think this shade is extremely flattering, and so even if you aren't as tan, maybe looking for a more peachy shade of blush would be equally as flattering, as it adds some colour and depth to the face without being a heavy or unnatural layer.


The amount of times I have probably said healthy is probably too much, so luckily my next item is an eyeliner, so the word healthy wouldn't really work in this context! I've been reaching for the Collection Fast Stroke Eyeliner (£2.99/3.8g) to complete my look as it just finishes my summer makeup off. I feel like without this I look like I have just woken up, eyeliner just has the ability to define the eye in such a way that you can notice it without  it overshadowing the entire look. I've just used this Collection one for the past week or so, but I quite like it, it's super black and the brush is easy to control too. I might do a more in-depth review of this product in a few weeks after it's had more of a road test! Another reason black liquid liner is a staple is because as it is a liquid, it doesn't tend to move around too much, and as it is black too it doesn't fade away as much as my brown pencil eyeliners and so it's become a summer necessity for me.


I've swatched the Flawless Filter on the right, the Collection Fast Stroke Liner in the middle and the NARS blush on the left. All the three products are pigmented and so are long lasting on the skin - perfect for summer!

These three types of items are just what I have been reaching for lately. I would love to know your go-to summer makeup essentials in the comments below. If you like my content please subscribe on Bloglovin to keep up to date with any new content! 
Share:

Thursday, 10 August 2017

Makeup Mistakes + Fixes!

As we get older, we find new ways to do old things. So I present to you a few of the mistakes I used to do when I first started applying makeup. If you are a novice you might be able to learn from this, however if you are a pro at makeup then these may sound a bit familiar!


1) Artificial Lighting

Not having the right lighting can be catastrophic when it comes to makeup application. I'm not even exaggerating. I've applied makeup to go out in the day and when I came across a mirror the truth was revealed!
Dark lighting can make you over-apply products because you can't see it show up well on the skin. Artificial lighting is a bit more deceiving as it goes two ways, making you look flawless or it makes every attempt to hid your insecurities come out. I think the best way to deal with lighting is to go with natural lighting - as this is representative of how you will look outside. Actually, it might be a good idea to use the lighting that you will mostly be in, so natural lighting if you are spending the day outside, artificial lighting if you will be cooped up inside all day - this way the makeup you apply will look the same in your destination.


2) Eyeliner stability
Eyeliner is a product that almost everyone wants to master, however no amount of tutorials can really help with application, as you need to tailor your eyeliner to your eye shape and do this independently. I remember trying to learn how to do a liquid liner that suited me and it was a painfully slow process and no matter what I did, my liner would never be smooth and fluid, there would always be some bump in the line. So one tip that really helped me was to keep my elbow propped up by my desk. This meant that my hand couldn't drop down if I paused and just gave me more stability, rather than doing my liner midair.


3) Flat foundation brush

Brushes and makeup tools do have their day, and when I started to apply makeup, it was the age of the flat foundation brush. This isn't a bad tool at all, I think in combination with the bad lighting and my over-inflated confidence I misused this tool. I literally used to paint my face, so there was no blending out the edges of the face or just blending in general. I found that my makeup used to sit on top of my skin rather than be a part of it. Now I still use brushes, but for my base makeup, my Beautyblender is the holy grail, as it makes my makeup looks more seamless and skin-like, with minimal effort!


4) Blending eye shadow
Eyeshadow was one of the last things I got into. I used to wear foundation and blush mostly when I was 15 and although I liked eye shadow I knew that I didn't know how to be a pro at applying it. One of the biggest mistakes I made was using the same brush for everything, for the all over the lid colour and the crease shade and sometimes I still do this now, however my precision has changed. Before I just wanted to maximum pigment on my eyes and then things would be really tough to blend. Now I'm more keyed up to how well things will blend out, and if I want a subtle eye - how to go about it. One of the tricks that I know a lot of people use is to use a clean blending brush constantly to make sure there are no harsh lines. I think this really works, as when you use a blending brush that was used previously, the colour is still on the brush and you don't get that seamless finish, ombre style.


5) The use of products
When I was a kid, I was never really taught why people wear makeup. As in, I think when I first started to apply it, my goal was to make myself look like someone new - I think sometimes in the media we see the total transformation that makeup can really do. However I think there is some good inspiration on the internet, teaching kids nowadays the purpose of products and how they should be applying it. For instance, foundation is to even out the skin tone, so we don't treat it like concealer because the goal is to even out the base, not hide imperfections. Eyeliner is used to define the eyes, but we don't always need a jet black liquid liner to do this, a simple brown eye shadow blended in at the root of the lashes can also do the trick. I think this information is out there, however I don't think everyone accesses it.

I would love to know what makeup mistakes you guys used to make that seem so obvious to you now! Let me know down below and be sure to follow me on Bloglovin to stay up to date with my posts!


Share:

Thursday, 2 February 2017

5 Lessons I've Learned From Blogging

I've been blogging for just under 3 years now, and I have learned so much from the blogging community, through reading other blogs and just figuring some things out for myself. I thought I would compile all the things I have learned from my blogging journey.


1) Do you really need that?
So I am probably the best enabler for my friends to get them to buy certain products. However, when I recommend something, it's usually because they are having trouble with a certain product or they aren't happy with their current routine, so my advice is usually tailor-made towards them. The world of blogging however, is full of things that is advertised as things you can't live without, and honestly I think it's best if you take blog posts with a pinch of salt. I believe that blogs are honest, however I normally refer to them if I am having an issue or I want to see what's new on the market. I've bought so much stuff due to reading blogs, and the majority of them weren't really game changers.


2) Time management and organisation
If any of you guys have job interviews and you have a blog then it's good to mention it even if it's small blog like mine. I usually forget to do this, because I don't see blogging as a job, I see it as a hobby. What it has done for me is made me more time-efficient. If I know I have to get a blog post up in the next few days, I will then try to work out when I will take my photographs, and when I can get the time to sit down and write so that my posts are up on time, and have a certain quality to them. Employers love this, because it shows that I have genuine and original interests, because lets be honest, as much as I love to say that I enjoy reading in my spare time, it's one that a lot of people say.


3) Photography
This is still one of my weakest things, however it's a working progress, and I feel like photography is something that most people struggle with because there are a lot of factors to consider, such as background, lighting, props and camera. I've found that I really like flat-lays, and I like to keep my photo's as simple as possible, with as less props as possible because my photo's have a tendency to look messy very fast. I also feel like I've mastered Instagram photos more than I have mastered photo's on my blog which is strange but true!

4) Being happy with your blog
So I think being jealous of other peoples blogs or followers is common in the blogging community, and I totally understand why people do it. I was one of them, I was desperate to do as well as others have done, especially because I felt like I had been blogging for a longer period than others. However, I have learnt to just focus on my own content, and look towards other blogs for inspiration, and funnily enough, once I had start doing that, I started to get more followers. It's also important to keep remembering why you are blogging too, it is competitive, but if like me, you are just blogging to talk about things you love and give advice, then I feel like the content comes from a more honest place.


5) Advertising
For about a year of my blogging journey, I didn't advertise any of my posts. I think I was embarrassed to show people how much I loved make-up, because lets be honest, it's not the deepest topic. However, once I did eventually start, I found that my friends found my posts helpful and started to ask me for advice. Twitter was a life-saver in terms of advertisement as you can constantly put your content out there and with the help of hashtags and RT pages without overly annoying people.

I would love to know what any of you guys have learned from blogging, if you do blog, and perhaps what you like to look for when reading blogs? Be sure to follow me on Bloglovin to stay up to date with my posts!

Share:

Monday, 9 January 2017

5 Tips: How To Maintain Healthy Nails

So I've always considered myself quite lucky to have nails that grow fast. However for the past four years I have been actively maintaining my nails, and I wanted to share my top tips and tricks for how to keep your nails in the best shape.


1) File to Shape
So I hardly ever really cut my nails, I only reach for my nail clippers if I have seriously neglected my nails that they have grown so long and eventually broken into a variety of shapes and sizes. I think we need to start from scratch sometimes and file our nails down to all have the same shape. When I first did this I was left with seriously short nails but they were all the same shape and size and just looked a lot more pleasing. Additionally, nails are easier to maintain when they are shorter as they are less likely to break and chip. So every week you can begin to file where you need to file, and in no time you'll have longer nails that are the same shape!


2) Identify your problems
This is a weird one, but I think we all have a problem point when it comes to nails; you may bite your nails, wear so much nail polish that you are suffering from nail yellowing, or have nails that break easily. The list goes on and on. So if you suffer from biting your nails, perhaps invest in those bitter nail polishes. If you are suffering from yellowing nails, then I suggest taking a break from nail polish, because it's always good to air your nails out! If you have nails that break easily, it might be good to file them a bit shorter so that you can focus on making your nails a bit stronger.

3) Moisturise!
So I've recently done a post all about hand creams, I think it's good to keep your hands moisturised as they are one of the areas of your body that shows the signs of aging first. When adding hand cream, it's easier to massage your cuticles, and push them back. My favourite hand cream for when I am doing my nails is the  Sanctuary Spa Velvety Hand Cream (£3.00/30ml), it's super luxurious formula and leaves a super subtle but lovely scent behind. 


4) Avoid too much water
Drinking lots of water is good, however exposing your nails to lots of water isn't the best thing. Have you guys ever noticed that when you finish washing the dishes or coming out of a long shower that your nails are bendy? So if you are prone to nails that snap off for what seems like no reason, this might be something to look out for. Also avoid filing your nails when they are still wet, your nails are at it's weakest, and you are probably doing more damage than good.

5) Invest in treatments
Sometimes we all need put in a bit more effort to maintain our nails. This may be investing in nail hardeners, if you have brittle nails, or cuticle oil if your cuticles are hard to manage. I remember when I suffered from yellowing nails, I bought a base coat because I didn't want to stop wearing nail polish, and low and behold, my nails returned back to their usual colour. It's normally the small, simple steps we miss out that can have an effect on our nail health the most. Diet and water is important, and this should probably be the first factor you look at. Another thing I like to do is to get my nails professionally manicured once in a while, because if the nail technician creates the shape I want, all I have to do is maintain it.

I hope this post was helpful for those of you who are having a bit of trouble maintaining the healthy nails you want! If you have any tips and tricks that I missed out then I would love for you to share in the comments below. Also be sure to follow me on Bloglovin to stay up to date with my posts!
Share:

Monday, 5 December 2016

How To: Curl Eyelashes So They Last All Day

So today I am going to share one of my biggest beauty secrets, it's something I do everyday when I get ready, and it honestly works. If you are like me and have the straightest lashes the world has ever seen, or if after curling your lashes they drop miserably, then I really want you to try this. I'll show you my top tip and my current routine to get the best out of your eyelashes!


Okay, so before we start I want to explain the benefits of having a good eyelash curler. For maximum results, your eyelash curler should be metal, and needs to fit the shape of your eye nicely. My eyelash curlers are from Shu Uemera, they were a gift from my friend Sakura in 2014 and I still use them. They retail for £20 and it are worth the investment as they get used every day because it performs so well. 

So here is the secret: I heat up my eyelash curlers with my hairdryer for a few seconds. I actually get my eyelash curlers piping hot and wait for them to cool down enough so they won't burn my eyes. So I will place them either on wrist or lightly on my lips to test if it's safe to place on my eyes, as those two areas are super sensitive to heat. Once I've safely tested them I will proceed to curl my eyelashes, angling the curlers toward the crease of my eyes, instead of parallel to my face. I find that this gives them a little more lasting time and I usually hold my eyelashes for a good 20 seconds. Once that is done, I will get a mascara that has a thin and waterproof formula, so this is where my L'Oreal Volume Million Lashes Waterproof Mascara(£9.99/9ml) comes into play. This mascara has a great separating wand so I can capture all the lashes that I have curled and just puts enough product on my lashes to hold the curl in place while not weighing them down. You can really see how battered this mascara is, I've had it for almost a year and the drier the formula, the better as it has less chance of being weighed down!


So at this point, your eyelashes are nicely curled, and mascaraed up, however it's only just a light layer that has dried down. You can leave it here if you are short on time, and just prefer this look, which is what I do most days. This is the point where I will add in another mascara, if I want really thick, black lashes. For this I have been using the L'Oreal Mega Volume Collagene Mascara (£9.99/10ml), as it really works to add volume the lashes, adding thickness and length, which gives my eyes extra depth and intensity. I love using this duo, as I get lashes that are my own, but the much better version that lasts all day!

I would love to know if you have tried this, or are going to try this, because it's just my ride or die when it comes to eyelashes! What's your favourite eyelash product? Be sure to follow me on Bloglovin for more beauty posts!
Share:

Monday, 10 October 2016

5 Tips: How To Wear Less Make-up!

Am I the only one who wants to start to wear less make-up? Day to day, is the highlight and contour really necessary? Sometimes, in retrospect, it makes me a bit uncomfortable, knowing I have totally glammed up to run an errand, or to go for a walk in the park. Believe me, it has happened to me so many times. 
So today, my only errand was to go and post a letter, and I was about to sit in my usual make-up spot, on the floor next to my full length mirror, and I just knew that I would spend 10 minutes applying my makeup for a 2 minute errand. So I decided to fudge it, I stuck on my clothes, grabbed my sunglasses and headed out bare faced. Just arriving back from my trip, I wanted to write, and give you guys some tips on how to ditch the Instagram face for day to day life.

1) Do your make-up last - When you are getting dressed, leave the make-up for last because once your hair and clothes are put together, you'll realise that you can skip a bunch of steps in your routine  and still look put together, an even complexion is more important to me than highlighting, and adding some brow gel might be good enough when you are in a rush! This is what really put me in perspective today, just knowing I would be out of the house for just two minutes doesn't qualify for me to waste my time nor my products.


2)  Feature Focus - A good way to not wear as much make-up is to focus your attention on the thing you want to be happy with. Personally, I like to focus on my face and brows, my face because I have a bit of hyper-pigmentation, and my brows because they are so light and sparse. As long as those two features are dealt with, I feel much more confident to go about my day, and it only takes me 5 minutes. If you are a lip person, you can generally leave out eye makeup as your lips will be the statement piece and so you don't have to really bother wasting too much time on something that doesn't need to be done!


3) Go sheer - Another way to wear less, is to keep perhaps the same amount of products, but to opt for more natural and lighter finishes. So I am a major high coverage foundation gal, and I recently bought the Dior Forever Foundation, which is more of a medium finish, and I already feel like I am accepting my natural skin more and more. I eventually want to get to the stage where I am wearing a tinted moisturiser, because I think it's good for your skin to breathe, and just not be caked in layers of foundation! You could also go sheer in terms of lipstick, or wear brown eyeliner instead of black, apply brow gel to tame the brows rather than going for the Instagram brow. 


4) No time like the present - Like I said earlier, today I decided to fudge it and just head outside with no make-up. You might be like me and think 'I'll try it tomorrow', however the hard truth is that tomorrow never comes, the future becomes our present and so the things you wanted to do just never end up happening. That's why you should start straight away, perhaps give a think about the make-up you want to wear today and get it out ready, give yourself a time limit to get ready. When I am in a rush, I always wear less because you don't want to waste time. If I have time, I will literally sit down and apply green eyeliner and contour for a walk in the park so, if you give yourself only 5 minutes to get ready then stick with it and learn to enjoy wearing less. 

5) It takes time... I know this seems to contrast a tad  what I said before but it takes time to accept going outside with a face of two products rather than 7. The more you do it, the easier it will become, so if you want to wear less make-up or none at all, you need to be consistent and learn to love it. What happens is that you think that people will notice that you aren't as done up however, those same people will have changed something about themselves that they think you will notice. People are introspective for the most part, and usually don't notice what you've spent all day fretting about!

I would love to know if you are considering wearing less, or beginning to wear more, so leave me a comment below telling me your current make-up mood! All the photos above were taken from my Instagram! So if you like them then be sure to follow me on there, and as always please subscribe to my blog on Bloglovin' to keep up to date with my next post! 
Share:

Tuesday, 13 September 2016

5 Skincare Hacks

I love hack videos and blog posts. Anything that might help me be more efficient is a Godsend to me. Recently I've noticed that for the past year I have changed my skincare, without actually changing the products. This sounds strange but these are my 5 Skincare hacks that will help your skin to look more healthier and radiant...


1) Muslin Cloths
My muslin cloth is my ride or die, whenever I travel - even if it's for one overnight stay - I have to pack it with me. A muslin cloth is used to help take off makeup and generally cleanse the skin. So after I have applied my oil/balm cleanser (currently Oskia Renaissance Cleansing Gel) and massaged that into my skin, I will run my muslin cloth under some warm water, rinse it, and then start to remove any traces of the cleanser with the cloth. This acts as a facial steamer as it is opening the pores so they are ready to be clean, it also acts as a gentle exfoliator as wiping the damp muslin cloth across the face really eliminates any dry, flaky skin. I use this with normal foaming cleansers too, as it removes the product off my skin so well, and honestly having a warm cloth on your skin just feels so therapeutic and relaxing! The reason why I am specific about muslin cloths is because the fabric is tightly woven and so exfoliates without irritating the skin, but face towels can also work! It's also handy if you travel and don't want to lug around your normal facial scrub! Excuse the extremely worn out photo of my Liz Earle muslin cloth! 

2) Patting instead of rubbing
This sounds so lame, but when my face is wet I don't rub it harshly with a towel. Instead, I pat my face dry using the towel. I find this is more gentle and my skin doesn't get as irritated and red when I use this method. You get used to doing it, it's become an unconscious habit for me now. Even when I use facial mists, I pat them into the skin using my fingers. I find by doing this, I am able to retain some of the moisture instead of wiping it all away. 


3) Right method for right formula 
Using a moisturiser is different than using a serum or a facial oil. As a general rule I tend to massage in my moisturiser and facial oils and pat/press in my serums. I think in the first week of using a product, you should play around and try to find the best method for application. When I first got my Sunday Riley Luna Oil, I think I heard that you were supposed to press in the product which led  to me not noticing anything different with my skin for a few days. The night where I massaged it in instead, I saw a difference in my skin the next day. So test and try out what works for you!

4) Tying the hair
If you are one who suffers with breakouts and perhaps may not know the cause then this may be of use. Before you go to sleep, lightly tie up your hair so that it is away from your face. Hair, like every other part of us, carries bacteria and also oil, which can transfer onto your face. This can also apply to when your hair is more greasier, if you leave it out of your face then it may help minimise the chances of breakouts. 


5) Double Cleanse
So any of you who use a toner in your skincare might be aware of how much dirt and make-up can still be left on the face after cleansing. So I tend to cleanse a few times - I start off with my make-up oil/balm cleanser, then I go in with a cleanser to get rid of the residue, an exfoliator and then my final cleanser. I know, I know, it sounds excessive but there is no dirt left on my face so it's why I stick with it!  

I have to say, it's so weird to write this all down! All of these five things are part of my daily routine and things I usually don't think twice about. I hope some of these hacks will come in useful to you guys! I would love it if you guys subscribed to my blog on Bloglovin'!
Share:
Blog Design Created by pipdig